Adding and removing users on WordPress is a piece of cake and is one of the many advantages of having a WordPress site. You can assign each user a different permission level depending on what sort of work they will be executing on your site. Permissions range from subscriber level, which has many access limitations, to Administrator, which has no restrictions. In this article, I will show you how to add new users, remove users, and assign permission levels.
Adding A New User
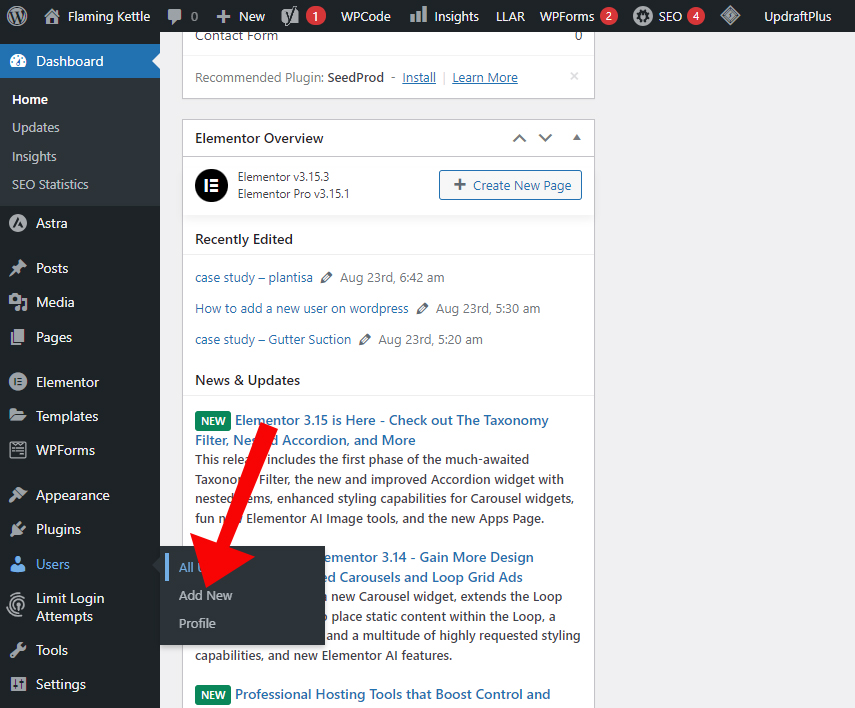
STEP 1. Access your WordPress Dashboard
Once logged into your WordPress Dashboard, hover your cursor over the “users” tab on the left-hand side menu. Then, select the “add new” link.
STEP 2. Details and user role
After being taken to the user page, you will want to fill out the details for your new user, I have used “example” for reference.
Keep in mind that selecting a strong username and password is essential to avoid brute-force login attempts. Usernames such as admin, manager, or user should always be avoided, as they are the most likely attempted usernames within the WordPress login portal. Similarly, we recommend a strong password with various characters, numbers and symbols.
Once all of the user details have been completed, hover over the “Role” section and select the dropdown menu shown in the image below. Select the intended role for your new user.
Selecting the correct user role is essential when multiple users are on the same site. Only trusted users should be given roles with higher permissions. The following article by WordPress explains the difference between different user roles.
Once the correct user role has been selected, click the “Add New User” button. You have now successfully created a new user on your WordPress site.
Removing A User
Having only the users essential to your site is the best practice to keep your site as secure as possible. Removing unnecessary users is the simplest way to keep unwanted logins on your site.
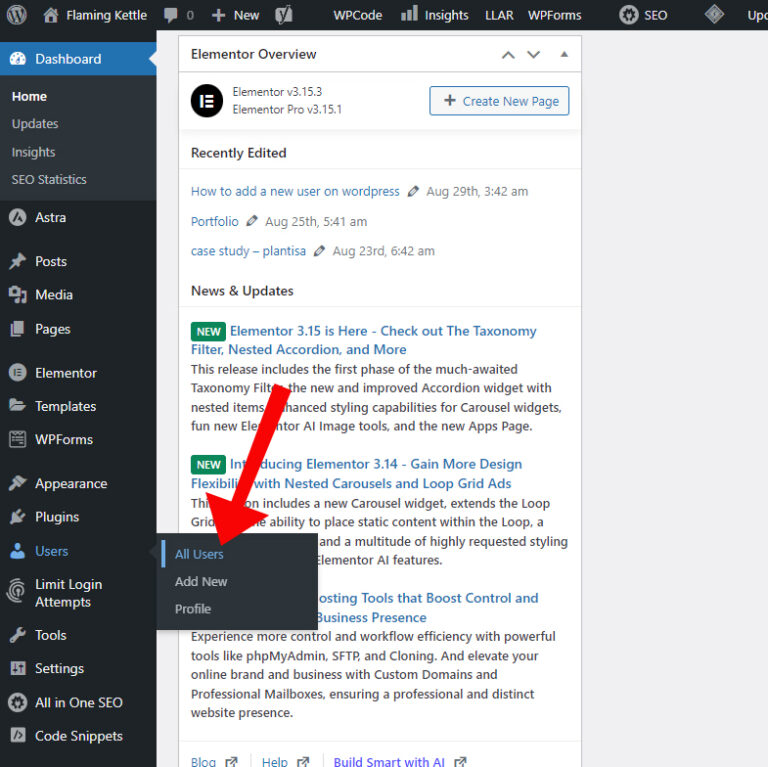
STEP 1. Access your WordPress Dashboard
Once logged into your WordPress Dashboard, hover your cursor over the “users” tab on the left-hand side menu. Then, select the “all users” tab.
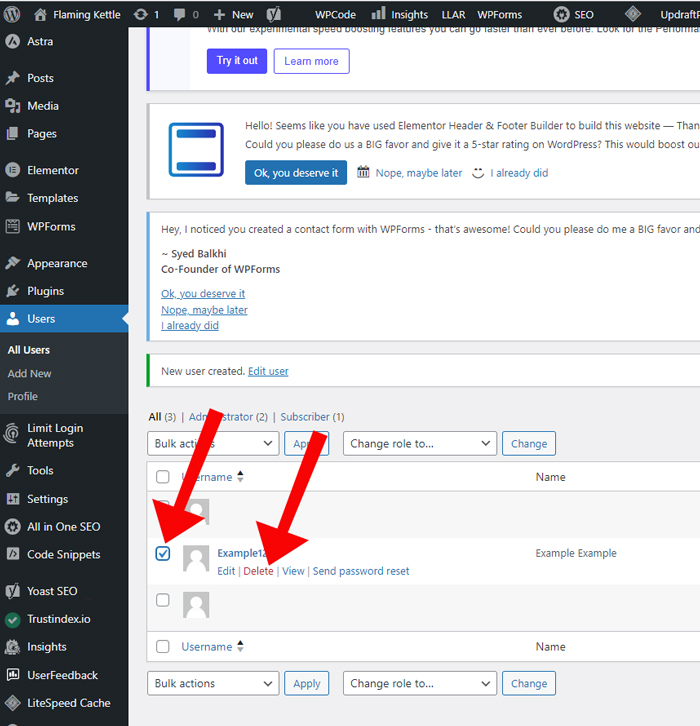
STEP 2. Select User and Remove
After being taken to the user page, you will want to select the user that requires removal. Click on the check box for that user and select the red delete button shown in the image below.
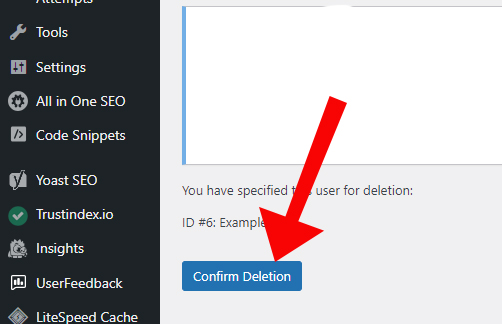
STEP 3. Confirm Deletion
After selecting “delete”, a request to confirm deletion will load. Select the button “confirm deletion” to permanently remove your intended user.
Congratulations, you have just removed a WordPress user!