DIY Edits in Elementor
a step-by-step guide
Not everyone is happy to pay a web company every time they want to update content on their website. Some people choose to because they don’t have the time and are more comfortable paying a professional because they know it will be done correctly.
If you are someone, however, who prefers to self-manage their website and it was built with a drop-and-drag website builder such as the one Flaming Kettle uses, Elementor, then we have good news…
It’s super easy!
That said, editing some elements can be trickier than others. For most people, though, knowing how to make basic edits, such as editing lines of content or switching out an outdated image, is super handy.
In this article, we’ll provide a quick how-to guide to make these simple edits yourself. This way, you won’t need to rely on a website company if you’d rather not have to.
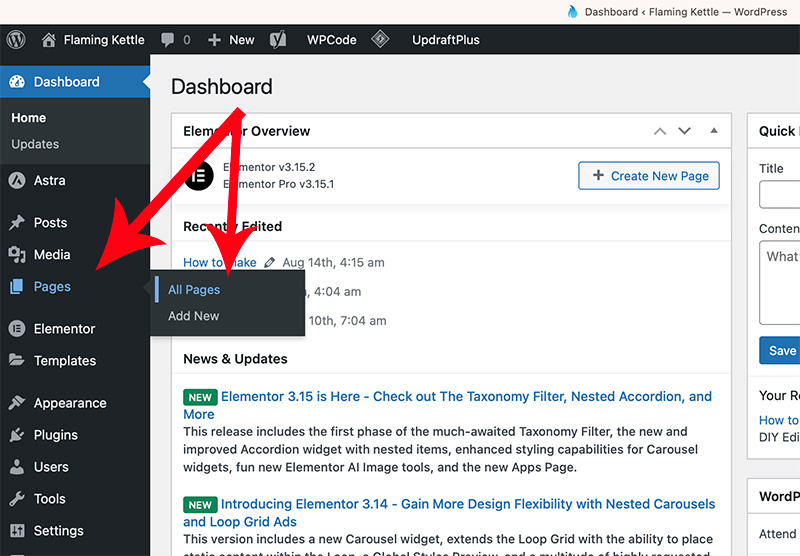
STEP 1. Access your WordPress Dashboard
If you haven’t already, you would want to familiarise yourself with the WordPress dashboard. In the left-hand-side column, you can see the “Pages” tab. If you hover over the tab, you can view “All Pages” or “Add New”. For now, we want to click on the general “Pages” tab or “All Pages”.
STEP 2. Select the page you wish to edit
Once you’ve moved to the pages menu, you can view all the pages for your site. When you hover over a specific page, options will be displayed below that page. We are learning how to edit on Elementor for this guide, so you will want to click that option.

*HANDY TIP* if you right-click and use the “Open Link in New Tab” option it can make switching to and from your WP dash a lot easier!
STEP 3. Let's Edit some content
The most common aspect you’ll want to edit is the written content on your site. Find the content you want to change and move your cursor over the area.
The margin around the section will highlight in pink, with a pencil icon in the top right corner which will arrive with “edit text editor” when you hover over it.
Click this to begin editing the section, or you can simply click anywhere in general over the text area.

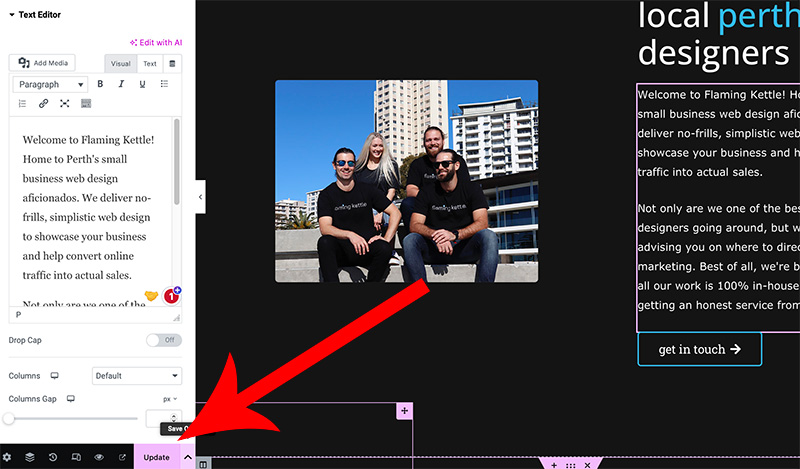
STEP 4. Changing content, styling & saving changes
When you click on an element like a text box, it will open its settings left-hand tab. Making text edits is very similar to writing in your average text doc or email and is mostly self-explanatory.
In the menu at the top, you can see “Content”, “Style”, and “Advanced”. It’s worth browsing in the style options settings to get more familiar.
The advanced menu may be too much for most beginners. It probably won’t contain any settings relevant to you for now.

Anytime you make edits to any part of your website before you leave, make sure to click the pink “UPDATE” button at the bottom left of the page. Otherwise, none of those edits will take effect.
STEP 6. what else can I edit??
Your website will be built with elements other than images and text editor.
Headings, buttons, icon boxes, carousels, accordions, image boxes, call-to-actions, and price tables are among the most common. The exact steps for editing these elements apply.
It is important to be aware that whilst editing content won’t impact any formatting, changing images may depending on the dimension size of the new image. If you also find that your new image doesn’t quite seem to fit like the old image, keep in mind the ratio aspect of the image – is one landscape while the other is portrait?
Also, the built-in margins and padding for that website section. This will affect how an image will be displayed and can push other elements aside or down, affecting the overall layout.